Due to the game’s current state, however, there have been a few issues. Random crashes and stuck loading screens are among the most notable. You may also encounter many frustrating obstacles on the way. In this article, we’ll look at one of such annoying bugs, tell you How to fix Halo Infinite Customization Not Loading.
Fix Halo Infinite Customization Not Loading 2022
Video game developer 343 Industries created Halo Infinite, which is a free-to-play multiplayer online battle arena. Microsoft Studios published it. Halo Infinite has been well received by gamers on Steam and iOS. You can follow this guide if the game gets stuck on the loading screen for some players.
1 Fix Halo Infinite Customization Not Loading 20221.1 Disable IPV61.2 Check System Requirements1.2.1 Minimum System Requirements:1.2.2 Recommended System Requirements:1.3 Increasing Virtual RAM1.4 Change Teredo State to Enabled1.5 Placing the RAM and Storage in the Appropriate Slots1.6 Close Unneeded Background Tasks1.7 Instead of Steam, Use the Xbox App1.8 Update Halo Infinite1.9 Check for Windows Updates1.10 Disable Overlay Apps1.10.1 Disable Discord Overlay1.10.2 Disable Xbox Game Bar1.10.3 Disable Nvidia GeForce Experience Overlay1.11 Do a Clean Boot1.12 Verify the Game Files
An alternate timeline is depicted in which humanity has been driven from Earth following a war between the Covenant and UNSC. Humans have established colonies on other planets. Still, we are at war with an alien race called the Prometheans. Halo Infinite, however, is also stuck on the loading screen, similar to other PC games. As we have mentioned, there are several possible workarounds you can try to fix the stuck-on loading screen.
Disable IPV6
With IPV6 enabled on your Windows PC, Halo Infinite appears to have issues working properly. Thus, you will have to disable it from Control Panel in order to make the game work as advertised.
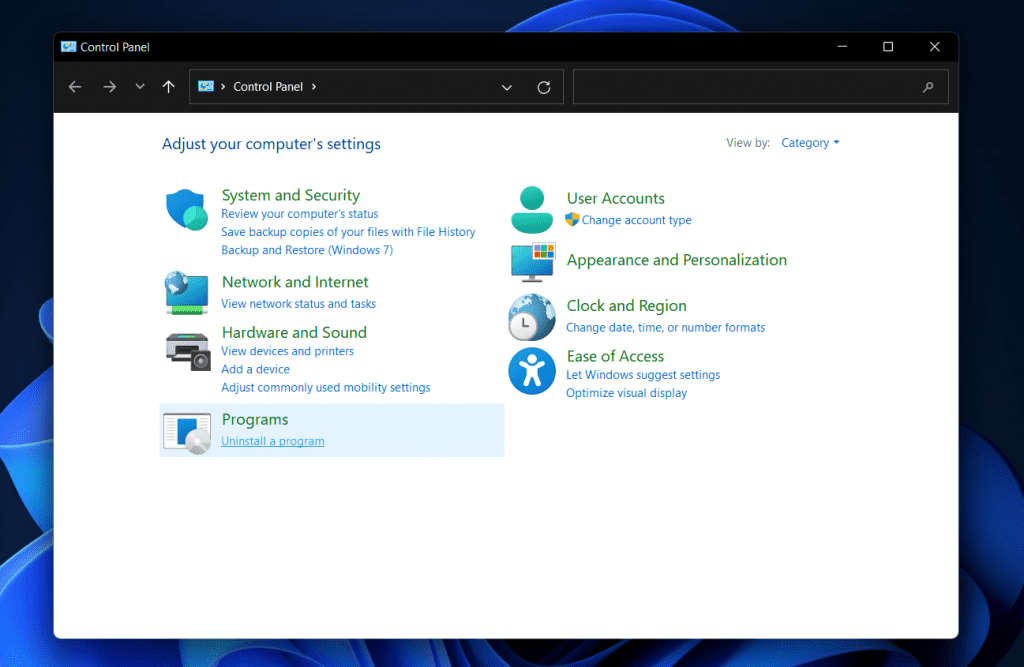
To open Run, press Windows + R. Look for “Control Panel.”
Click on ‘Network and Sharing Center‘.Select ‘Change Adapter Settings‘.
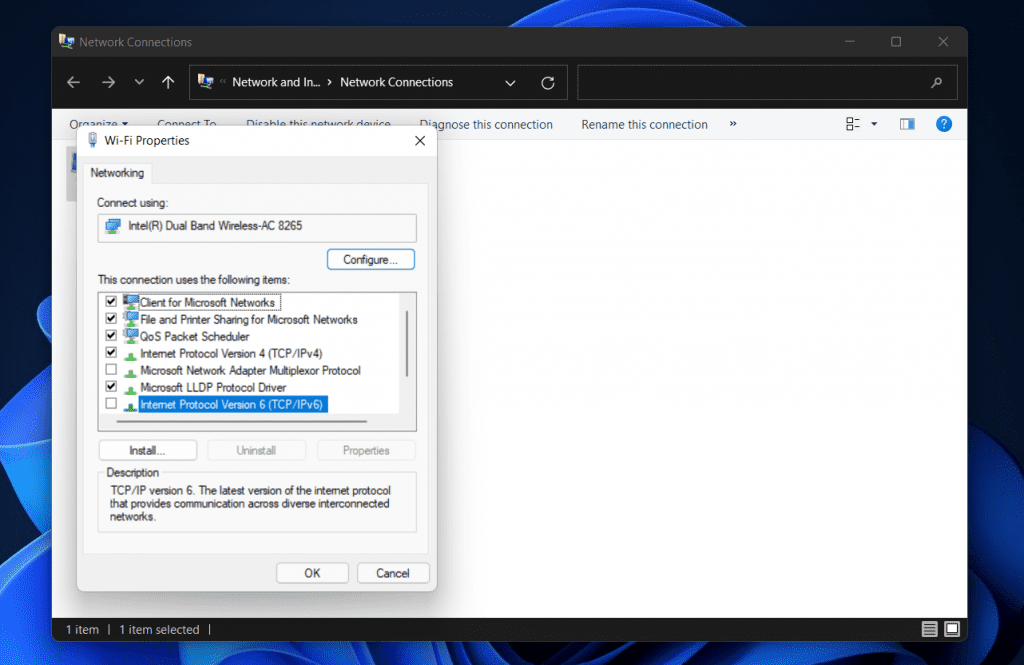
Select your current network connection by right-clicking. Click on ‘Properties‘.
Remove the check from ‘Internet Protocol Version 6’. Hit ‘Ok’.
Try relaunching Halo again.
Check System Requirements
Before making any decisions, be sure to check the system requirements. In case the configuration of your computer isn’t compatible, you may experience problems launching and playing the game.
Minimum System Requirements:
Requires a 64-bit processor and operating systemOS: Windows 10 RS5 x64Processor: AMD Ryzen 5 1600 or Intel i5-4440Memory: 8 GB RAMGraphics: AMD RX 570 or Nvidia GTX 1050 TiDirectX: Version 12Storage: 50 GB available space
Recommended System Requirements:
Requires a 64-bit processor and operating systemOS: Windows 10 19H2 x64 or Windows 11 x86Processor: AMD Ryzen 7 3700X or Intel i7-9700kMemory: 16 GB RAMGraphics: Radeon RX 5700 XT or Nvidia RTX 2070DirectX: Version 12Storage: 50 GB available space
Increasing Virtual RAM
Virtual memory is a combination of RAM and temporary hard disk space. To increase your virtual memory manually, you’ll need to upgrade your RAM if it is not large enough for your needs. In one of our previous posts, we went over how to change the virtual memory size in Windows 11 easily in detail.
On the keyboard, press the Windows logo key. Enter advanced system settings.Select View advanced system settings.Select Settings. Select the Advanced tab. Select Change.Delete the check box next to Manage paging file size automatically for all drives.Choose your C: drive. Select Custom size under Options. Enter 4096 in the text boxes for Initial size and Maximum size.
Note: The virtual memory should always be three times larger than the RAM.
Click the Set button. Click OK to save the changes.Now, your computer and game need to be restarted.
Change Teredo State to Enabled
You might have some luck tinkering with the Teredo state if you are crafty with the Group Policy Editor. It’s as simple as enabling it. Select Enterprise Client and you’re good to go.
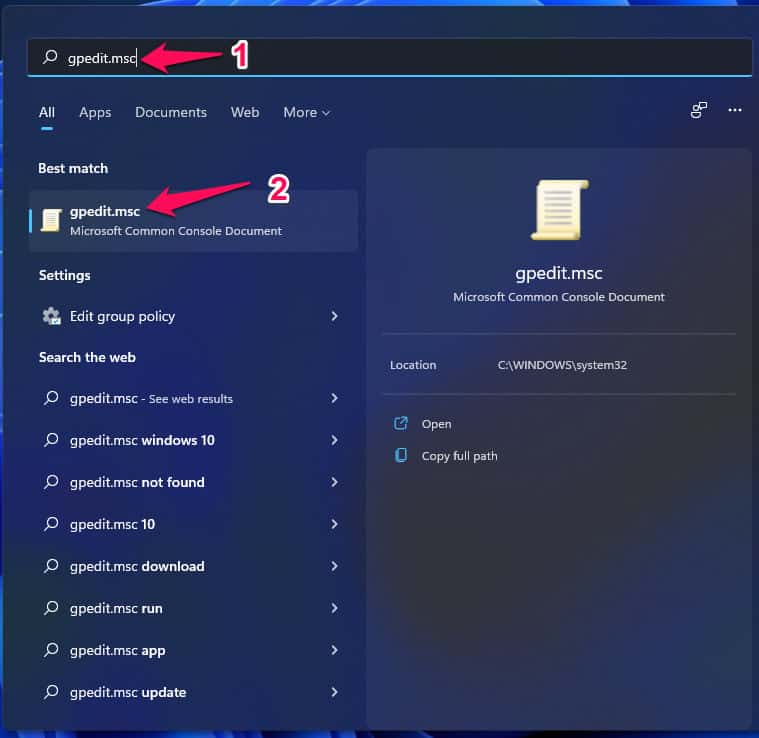
Open Run by pressing Windows + R. Type gpedit.msc.
Click on ‘Administrative Templates‘. Click on ‘All Settings‘. Then double-click ‘Set Teredo State‘.Last but not least, enable it. In the dropdown menu, select Enterprise Client. Then click OK.
Your computer needs to be restarted. Play Halo Infinite again.
Placing the RAM and Storage in the Appropriate Slots
Furthermore, removing the side panel of your CPU cabinet is highly recommended. Remove the HDD/SSD and RAM components from the slot. Clean the slot gently. Those components should then be placed properly again to verify whether Halo Infinite has been fixed.
Close Unneeded Background Tasks
To ensure that your computer is not consuming any additional system resources in the background, you can close unnecessary background tasks on your computer. Here’s how to do it:
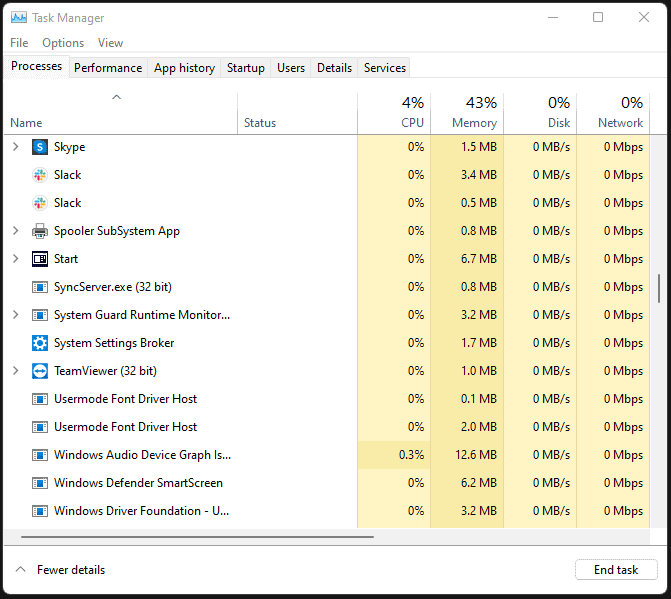
Open Task Manager by pressing Ctrl + Shift + Esc.
Select the Processes tab. Check the box to close the task.Click on the End Task button once you have selected it. You must complete each task individually.
You can change the effects immediately by restarting your computer.
Instead of Steam, Use the Xbox App
Steam has become the go-to client for many computer gamers since it acts as a hub for the biggest PC games. Steam is also the platform that hosts the multiplayer for Halo Infinite. You may not find it completely bug-free like the Xbox app. We recommend you download Halo Infinite multiplayer beta directly from the Xbox app.
Update Halo Infinite
If Halo Infinite hasn’t been updated in a while, then please check for updates following the steps below. If a patch is available, install it now. Follow these steps:
Launch the Steam client. Select Library. Scroll down to Halo Infinite.The update will be automatically found. Select Update if a new version is available.It may take a while for the update to be installed. After the update is installed, Steam should be closed.
To apply the changes, reboot your PC. Launch the game again.
Check for Windows Updates
Eventually, your Windows OS build may become outdated enough or corrupted. Please follow the steps below if you are also experiencing the same issue. If an update is available, please install it. Recent updates always fix bugs and improve performance. Here’s how:
Windows Settings can be accessed by pressing Windows + I keys.Continue by clicking Update & Security. Under Windows Update, select Check for updates.
You can download and install a feature update if one is available. The update will take some time to complete.
In order for the changes to take effect immediately, reboot your PC.
Disable Overlay Apps
The overlay program for a few popular apps appears to eventually run in the background. This can lead to performance issues with gaming or even launch problems. Turning them off will fix the problem.
Disable Discord Overlay
Launch the Discord application. At the bottom, click the gear icon.Under App Settings, click On Overlay. Select Enable in-game overlay.Go to the Games tab. Choose Call of Duty: Vanguard.Turn off the toggle for disabling in-game overlays.For changes to take effect, reboot your PC.
Disable Xbox Game Bar
To open Windows Settings, press Windows + I.Go to Gaming. Select Game Bar. Using the Game bar option, turn off recording game clips, screenshots, and broadcasting.You can find the Game Bar option in Windows Settings if you cannot locate it in the Game Bar option.
Disable Nvidia GeForce Experience Overlay
Open the Nvidia GeForce Experience app. Select Settings.Go to the General tab. Turn off the In-Game Overlay option.To apply the changes, restart the PC. Relaunch Vanguard.
Don’t forget to disable other overlays as well. That includes apps that run in the background all the time.
Do a Clean Boot
It’s possible that some of the apps and their services start right away while the system boots. Such apps or services will certainly utilize many system resources, as well as internet connections. Try performing a clean boot on your computer if you’re experiencing the same problem. Here’s how:
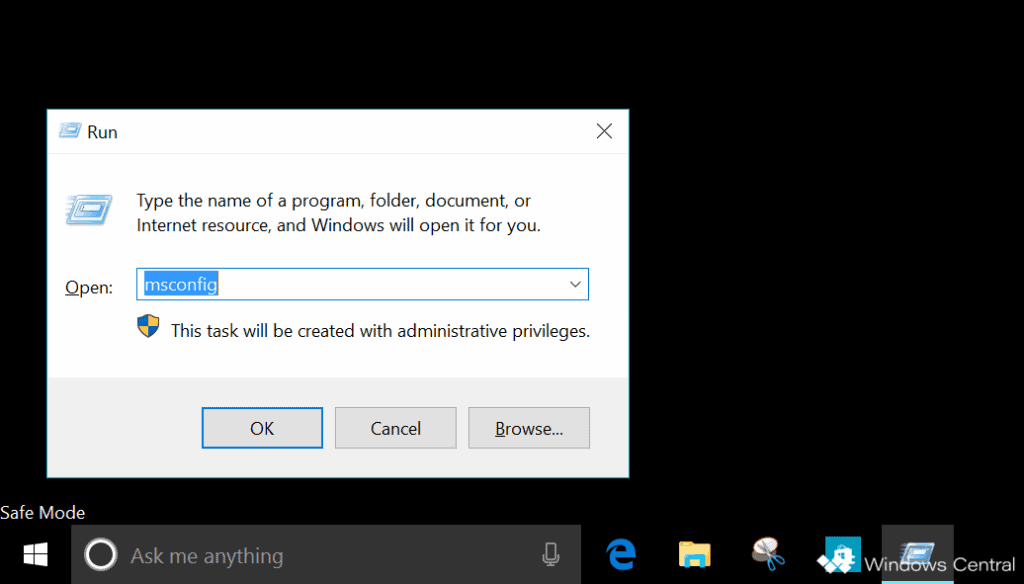
Open the Run dialog box by pressing Windows + R.
Enter msconfig now. Press Enter to open System Configuration.
Click on the Services tab. Check the box Hide all Microsoft services.Select Disable all. Click the Apply button. Click OK to save the changes.Click on the Startup tab. Select Open Task Manager.You will be taken to the Task Manager interface. Click on Startup.Click on the task whose startup impact is the highest.To disable them from starting, click Disable once they are selected. Each program with a high startup impact should be treated similarly.
To apply the changes, restart your computer once you’re done.
Verify the Game Files
The game’s files may be damaged if there is a problem. If it is somehow corrupted or missing, then follow this method to easily find out what’s wrong.
Start Steam. Select Library.From the list of installed games, right-click Halo Infinite.Select Properties from the menu. Select Local Files.Select Verify Integrity of Game Files.The process will take some time to complete.
After that, restart your computer. RELATED GUIDES:
Fix Halo Infinite Credits Not Appearing in Windows 10/11How To Fix Halo Infinite Game Chat Not WorkingFix Halo Infinite Not Working or Crashing On Windows 11Windows 11 Xbox Game Pass (2022): Run Android App, Play Games
That’s all about How to fix Halo Infinite Customization Not Loading. You will be easily able to solve this issue by following any of the methods mentioned above.
Δ